一、开始 虽然现在有了 flex 弹性盒子模型,很多布局效果都可以通过 flex 盒子来实现,但由于 flex 盒子模型的兼容性不容乐观
二、实例 正常的块级元素的布局是这样的:(文字代表元素的 float 属性)
1.如果浮动元素的上一个元素也是浮动,那么该元素会与上一个元素排列在同一行,如果行宽不够,后面的元素会被挤到下一行
2.如果浮动元素的上一个元素不是浮动,那么该元素仍然处于上一个元素的下方,根据浮动设定在左或者在右,而其本身也脱离普通流,后边的元素会自动往上移动到上一个普通流元素下方为止
对第二个元素设置 float:left,因为红色块不是浮动,所以橙色块仍在红色块下方,紫色块会向上移动到红色块(普通流)下方为止
如果对紫色块设置 float:right,则紫色块和橙色块都会位于红色块(普通流)下方,而紫色块相邻的下一个绿色块也会向上移动到红色块(普通流)下方。
如果我们想让绿色块留在原本属于他的一行而不向上移动,可以给他加上 clear:both,这样他就不会移动了
关于清除浮动:
1.清除浮动并不是说让浮动元素回到文档流 2.清除浮动只会改变改元素自身的位置,并且只针对排在该元素前面的元素。目的是让自己的左边或者右边没有浮动元素
当然用 clear 做更多的事,比如我们不想让紫色块和橙色块在同一行,可以在紫色块上加 clear:left
如果我们给绿色块加的属性不是 clear:both,而是 clear:left 的话,紫色块和绿色块就在同一行了
关键是记住一项元素布局的是他的上一个元素:
比如我们给橙色块加 clear:right,紫色块不加 clear,则橙色块和紫色块在同一行,橙色块的 clear 属性不会影响到紫色块:
高度坍塌:
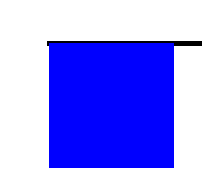
如果子元素是浮动,而父元素内没有其他内容,父元素的高度就会消失,我们可以通过设置 border 看到这个现象:
1
2
3
4
5
6
7
8
9
10
11
12
13
14
15
16
17
18
19
20
21
22
23
24
25
26
<style> #wrapper{ width: 120px; margin: 50px auto; border:2px solid black; } .container{ width: 100px; height: 100px; float: left; background: blue; } #wrapper:after{ content: ' '; display: block; height: 0; visibility: hidden; clear: both; } </style> <body> <div id = 'wrapper'> <div class = "container"> </div> </div> </body>
三、圣杯布局 所谓圣杯布局,即是两边定宽,而中间自适应的一种布局: 用到浮动、负边距、相对定位,不添加额外标签
html 结构为:
1
2
3
4
5
6
7
<div class = "header">header</div> <div class = "container"> <div class = "left">left</div> <div class = "center">center</div> <div class = "right">right</div> </div> <div class = "footer">footer</div>
填好一些公用的样式:
1
2
3
4
5
6
7
8
9
10
11
12
13
14
15
16
17
18
19
20
21
22
23
24
.header, .footer{ background: grey; height: 50px; width: 100%; text-align: center; line-height: 50px; } .left, .center, .right{ height:50px; text-align: center; line-height: 50px; } .left{ background: red; } .center{ background: black; } .right{ background: purple; }
这时候页面的结构为:
接下来我们想让 left 和 right 各占 50px 宽度,中间自适应:
1
2
3
4
5
6
7
8
9
10
11
12
13
14
15
16
17
18
19
20
21
22
23
24
25
26
27
28
29
30
31
32
33
34
35
36
37
38
39
.header, .footer{ background: grey; height: 50px; width: 100%; text-align: center; line-height: 50px; } .container{ padding: 0 50px; } .left, .center, .right{ position: relative; text-align: center; line-height: 50px; } .left{ float: left; width: 50px; margin-left: -50px; background: red; } .center{ float: left; width:100%; background: black; } .right{ float: left; margin-left: -50px; right: -50px; width:50px; background: purple; } .footer{ clear:both; }
即修改了 container 左右 padding:50px,center 宽度 100%,全部向左浮动,再加上 left 和 margin 等属性使之排列在一行
我们希望中间部分的高度被内容撑开,但此时如果任意一个的高度改变,其余两个的高度是不会变的:
这个问题我们可以通过 padding 补偿发来解决:
1
2
3
4
5
6
7
8
9
10
11
12
13
.container{ padding: 0 50px; overflow: hidden; } .left, .center, .right{ position: relative; text-align: center; line-height: 50px; padding-bottom: 1000px; margin-bottom: -1000px; }
主要是修改外层 container 的 overflow:hidden,给子元素一个足够大的 padding 并 margin 负值回来,就能够同时改变高度了:
最终代码:
1
2
3
4
5
6
7
8
9
10
11
12
13
14
15
16
17
18
19
20
21
22
23
24
25
26
27
28
29
30
31
32
33
34
35
36
37
38
39
40
41
42
43
44
45
46
47
48
49
50
51
52
53
54
55
56
57
58
59
60
61
62
63
64
65
<style> #wrapper{ width: 300px; height: 1000px; margin: 50px auto; line-height: 200px; font-size: 20px; color: white; text-align: center; overflow: hidden } .header, .footer{ background: grey; width: 100%; text-align: center; line-height: 50px; } .container{ padding: 0 50px; overflow: hidden; } .left, .center, .right{ position: relative; text-align: center; line-height: 50px; padding-bottom: 1000px; margin-bottom: -1000px; } .left{ float: left; width: 50px; margin-left: -50px; background: red; } .center{ float: left; width:100%; height: 100px; background: black; } .right{ float: left; margin-left: -100%; right: -100%; width:50px; background: purple; } .footer{ clear:both; } </style> <body> <div id = 'wrapper'> <div class = "header">header</div> <div class = "container"> <div class = "left">left</div> <div class = "center">center</div> <div class = "right">right</div> </div> <div class = "footer">footer</div> </div> </body>
至此,就简略的复习完了 float 和圣杯布局的基本知识点


